


Hey there! I'm a supplier in the business of Landscape Model Making. If you're into creating a rural landscape model, you've come to the right place. In this blog, I'll walk you through the whole process, from start to finish.
Planning Your Rural Landscape Model
First things first, you gotta have a clear plan. Think about what you want your rural landscape to look like. Is it a small village with a few cottages, or a large expanse of farmland? You need to decide on the scale of your model. A common scale for landscape models is 1:100 or 1:200, but it really depends on the size of the area you're representing and the space you have for the model.
Once you've settled on the scale, it's time to gather some reference materials. Look for pictures of rural landscapes, either online or in magazines. You can also visit a real rural area to get some inspiration. Pay attention to the details like the types of buildings, the layout of the fields, and the presence of natural features like rivers or forests.
Gathering Materials
Now that you have a plan, it's time to gather the materials you'll need. You'll need a base for your model, which can be made from foam board or plywood. You'll also need materials for the terrain, such as plaster, sawdust, or modeling clay. For the buildings, you can use balsa wood, cardboard, or even ready-made plastic models. You'll also need paints, brushes, and glue.
When it comes to the vegetation, you can use artificial grass, moss, and small plants. You can find these at hobby stores or online. You might also want to add some accessories like fences, animals, and people to make your model more realistic.
Creating the Base
The base is the foundation of your model, so it's important to get it right. Cut the foam board or plywood to the size you need, and make sure it's smooth and level. You can use a ruler and a sharp knife to make clean cuts.
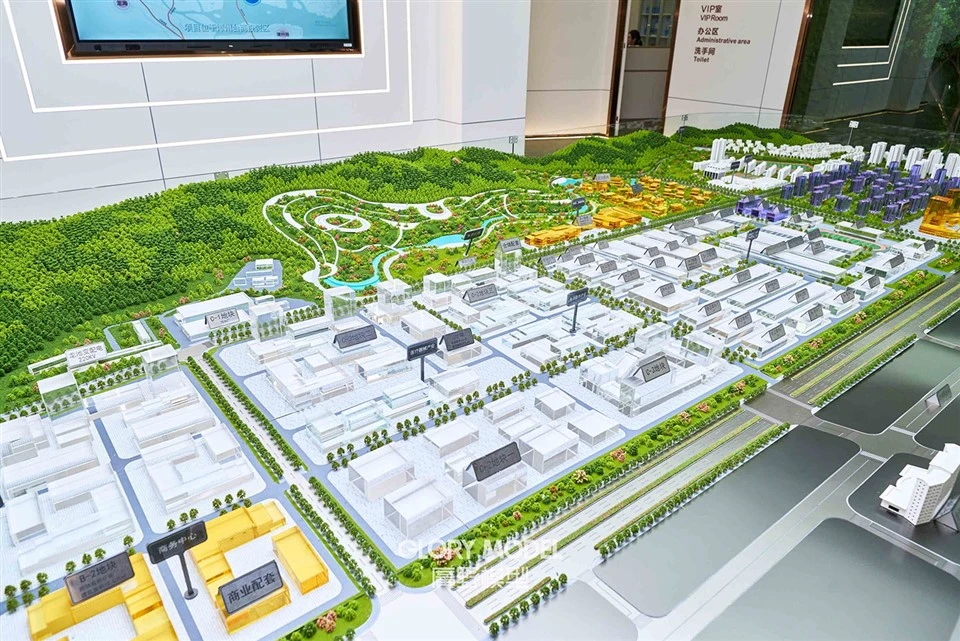
Next, you'll need to create the terrain. You can use plaster or modeling clay to build up the hills and valleys. Start by applying a layer of plaster or clay to the base, and then use your hands or a tool to shape it into the desired terrain. You can also add some texture to the terrain by using a brush or a sponge to create small bumps and ridges.

Building the Buildings
Now it's time to start building the buildings. If you're using balsa wood or cardboard, you'll need to cut the pieces to the right size and shape. You can use a ruler and a sharp knife to make clean cuts. You can then use glue to assemble the pieces together.
If you're using ready-made plastic models, you'll need to follow the instructions that come with the models. You might need to paint the models to match the rest of the landscape. You can use acrylic paints to paint the buildings, and you can add some details like windows and doors using small pieces of paper or plastic.
Adding the Vegetation
Once the buildings are in place, it's time to add the vegetation. Start by applying a layer of artificial grass to the terrain. You can use glue to attach the grass to the base. You can then add some moss and small plants to the hills and valleys. You can use tweezers to place the plants in the right spots.
You might also want to add some trees to your model. You can use small branches or twigs to make the trees, and you can paint them green to look like leaves. You can then use glue to attach the trees to the base.
Adding the Accessories
To make your model more realistic, you can add some accessories like fences, animals, and people. You can use small pieces of wood or plastic to make the fences, and you can use glue to attach them to the base. You can find small plastic animals and people at hobby stores or online. You can use tweezers to place the animals and people in the right spots.
Finishing Touches
Once you've added all the elements to your model, it's time to add the finishing touches. You can use paints to add some color to the terrain and the buildings. You can also use a spray varnish to protect the model and give it a shiny finish.
Conclusion
Creating a rural landscape model is a fun and rewarding project. It takes time and patience, but the end result is a beautiful and realistic model that you can be proud of. If you're interested in purchasing a landscape model or need more information about Landscape Model Making, feel free to reach out to me. I'm here to help you bring your vision to life.
If you're also interested in other types of models, check out our School Models and Industrial Park Models. We have a wide range of models to choose from, and we can also create custom models based on your specific requirements.
So, what are you waiting for? Start planning your rural landscape model today, and let your creativity flow!
References
- "Model Making for Architects" by Simon Unwin
- "The Art of Model Making" by John Pile
- "Landscape Modeling Techniques" by various authors


